Gluten-Free, Dairy-Free Berry Oatmeal Bars

A few weeks ago a friend of mine shared a recipe on Facebook that caught my eye. The recipe was for Ree Drummond’s Strawberry Oatmeal Bars. If you don’t know who Ree Drummond is, check out her blog called The Pioneer Woman. Her recipes are showcased with step-by-step photos that will leave drool on your keyboard – seriously! Obviously I couldn’t make the recipe as written because it wasn’t gluten or dairy-free, but I could modify it so that we could enjoy our own little piece of heaven. 

Surprisingly I had everything I needed on hand. Here are some of the substitutions I made and the recipe with the changes I made will follow. 

IMG 0763

Bakery on Main Happy Quick Oats & Enjoy Life All-Purpose Flour

IMG 0765

Earth Balance Soy-Free Buttery Sticks

IMG 0766

Crofter’s Berry Harvest Organic Premium Fruit Spread
IMG 0774

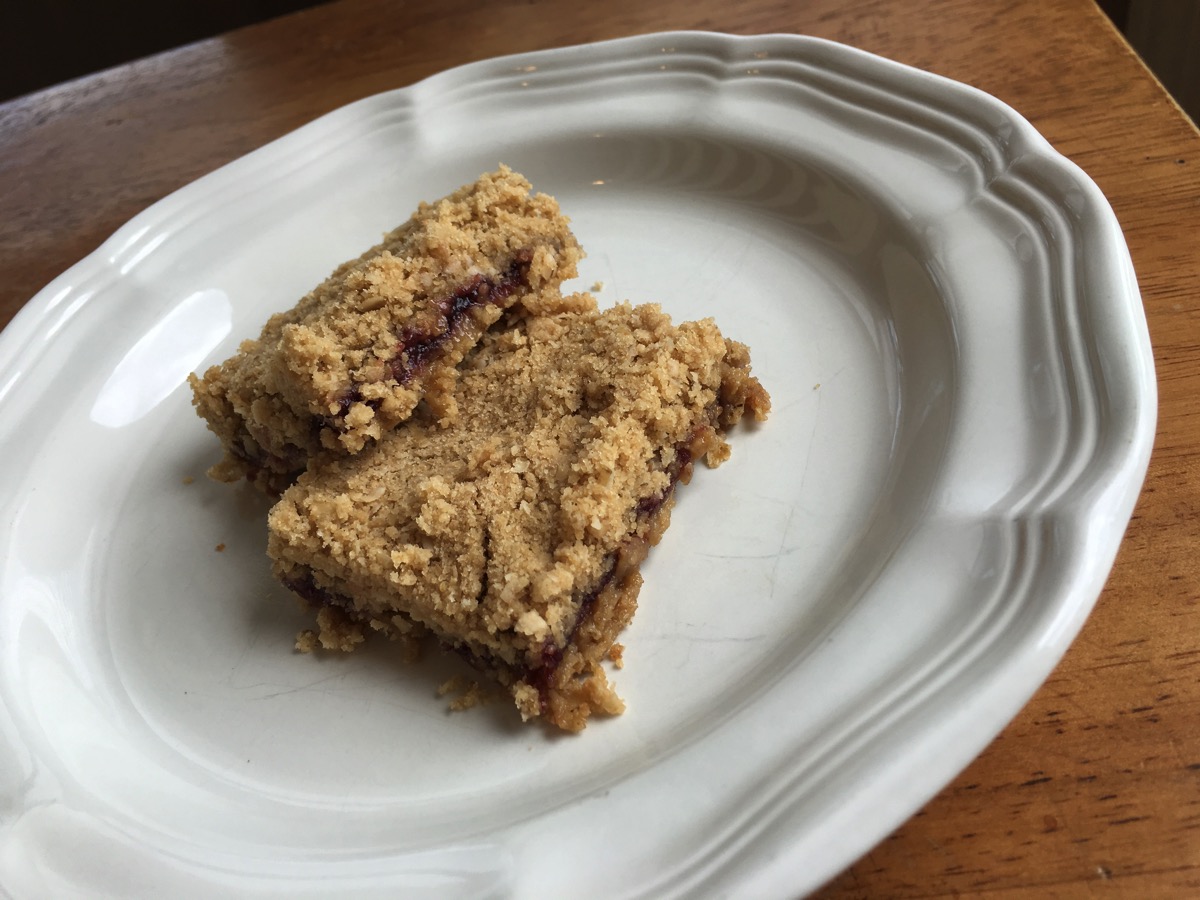
The finished bars. Holy guacamole were these good! Not only were they amazing when they were still warm, but once chilled in the refrigerator, which is where I stored them. Jon ate these for breakfast every day until they were gone. He loved them and asked that I make them again really soon!

Gluten-Free, Dairy-Free Berry Oatmeal Bars

*Modified from the original recipe courtesy of The Pioneer Woman – Strawberry Oatmeal Bars

  • 1 3/4 sticks cold Earth Balance Soy Free Buttery Sticks
  • 1 1/2 cups Enjoy Life All-Purpose Flour
  • 1 1/2 Bakery on Main Happy Quick Oats
  • 1 cup packed brown sugar
  • 1 teaspoon baking powder
  • 1/4 teaspoon salt
  • 10-12 ounces Crofter’s Berry Harvest Organic Premium Fruit Spread

1. Preheat oven to 350 degrees. Spray a 9 x 13 or 8 x 10 baking dish with cooking spray. 

2. Mix together dry ingredients.

3. Cut in the Earth Balance with a pastry cutter until the mixture resembles coarse sand.

4. Sprinkle half of the mixture into the pan and press down lightly to pack it down.

5. Spoon the Crofter’s spread over the mixture and use a spoon or butter knife to spread evenly.

6. Sprinkle the other half of the mixture evenly over the top and press down lightly. 

7. Bake until the top is light golden brown. This took me about 40-45 minutes, but I started checking it at 35 minutes. Remove from the oven and let cool in the pan. Once cool, slice into squares and enjoy!

Have a great day! 

~ Kim

Chocolate Red Wine Cupcakes – Gluten & Dairy-Free

A few years ago a dear friend made me a gluten-free birthday cake from the King Arthur GF Chocolate Cake Mix. The cake was one of the best I have ever tasted, gluten-free or not gluten-free. When I was thinking about what to bring to a get together last week, I knew I had to make cupcakes with that mix. 

After verifying that the mix is indeed dairy-free in addition to gluten-free, I began to read through the comments on the King Arthur product page. The first comment suggested using red wine in place of the water the mix suggested and olive oil in place of the vegetable oil. I love wine, and the get together was wine-themed, so I made the cupcakes with those substitutions. 

IMG 0541

Hannah helped me bake them and made sure to arrange the cupcake liners so that we had an even amount of each color. After the cupcakes cooled, I frosted them with homemade chocolate frosting based on the recipe on the side of the Hershey’s Special Dark Cocoa can. 

Dark Chocolate Frosting

Gluten and dairy-free

1. Combine Earth Balance and cocoa with mixer until blended. 

2. Alternatively add powdered sugar (about a cup at a time) and almond milk until desired consistency is reached. 

3. Add vanilla and blend well. 

4. Frost cupcakes and enjoy! 

*Leftover frosting can be frozen. 

IMG 0558

These cupcakes were a huge hit! So much so that Hannah was still raving about them three days later when she finished off the last one. This comes from our uber picky eater that typically balks at anything gluten and/or dairy-free. 

If you try these, please check back and let me know how you liked them!

Happy Baking!

Zing Bar Introduces 100-Calorie Snack Bars

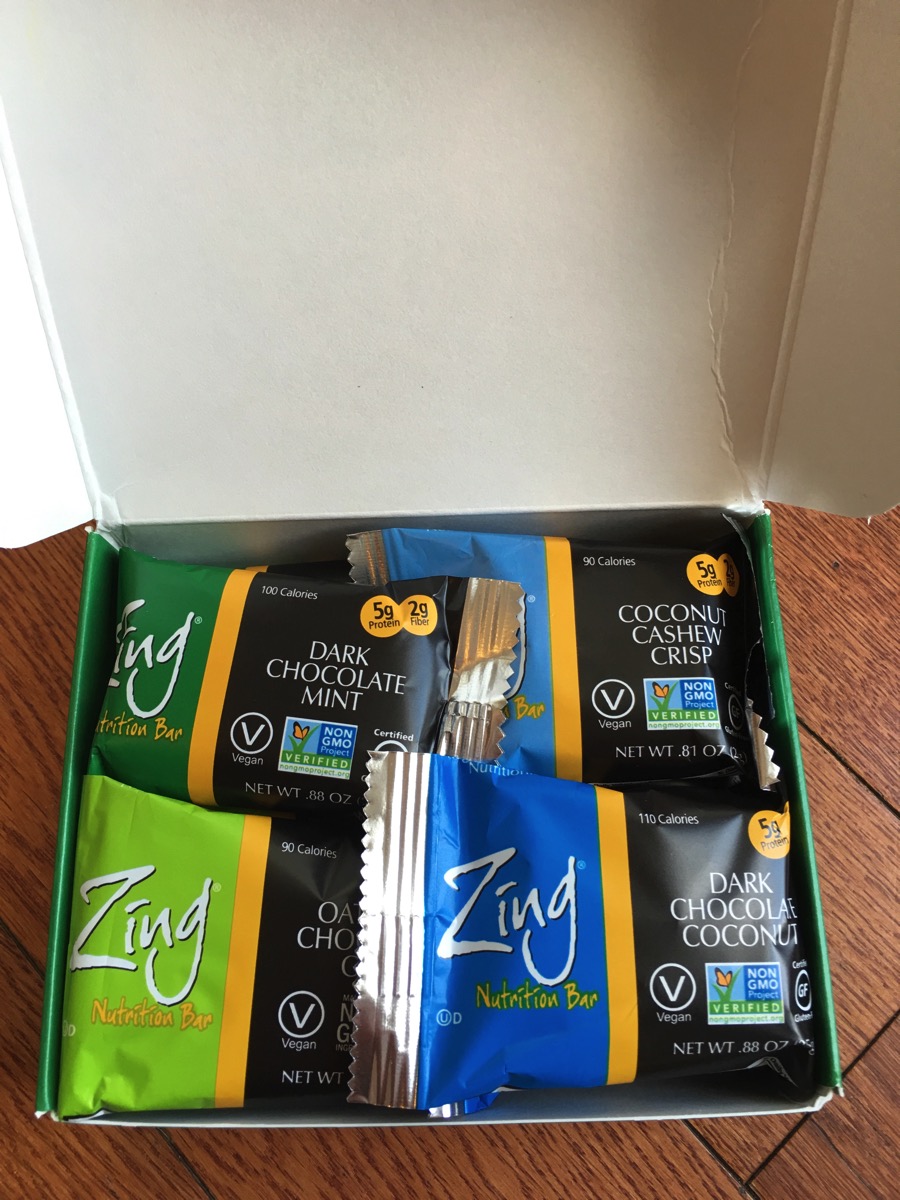
I can’t believe it has been over 6 years since I first reviewed Zing Bars. Zing Bars have now added a 100-calorie bar that is perfect for snacking, dessert, or packing in your school lunch boxes. I received complementary samples to review here on the blog a couple of months back. The smaller size is perfect for smaller children, to hold you over until your next meal, or satisfy a sweet tooth in place of a candy bar. 

Zing

More about Zing Bars:

Zing’s ‘clean energy’ snacks are not the typical nutrition bar.  The nutrition and energy bar industry was originally founded to address the needs of athletes.   These recipes relied on high glycemic carbs that could be burned quickly by athletes during exercise.    Zing has reformulated the nutrition bar recipe for real people, not athletes. The Zing formula is deeply rooted in ‘nutrition science’ around blood sugar— by turning the calories regular people eat into useable energy without the spikes and crashes, the low energy, the cravings, and the buildup of body fat.  All Zing Bars are wheat and soy free, gluten-free and kosher-certified. Nine of the twelve SKUs are Vegan and verified non-GMO.

Known for their great taste, Zing Bars have a nut or seed butter base and contain real dark chocolate, as opposed to the more commonly used compound chocolates. The new 22g-25g mini Zing Bars have between 90 and 110 calories each and come in six popular flavors: Peanut Butter Chocolate Chip, Dark Chocolate Coconut, Coconut Cashew Crisp, Dark Chocolate Peanut Butter, Dark Chocolate Mint and Oatmeal Chocolate Chip.

There isn’t a variety of Zing Bars that I didn’t like. I am a huge fan of chocolate, so I am loving the dairy-free/vegan chocolate bars! I think my favorite is the Dark Chocolate Mint or the Coconut Cashew Crisp. 

Zing Bars mini are sold in packages of 6 or 18 and are roughly $1.29/each. Look for the bars in select stores across the US or shop online

If you haven’t had a chance to try Zing Bars, put them on your grocery list today!

Seventeen Years Smoke-Free

Today marks seventeen years since I last smoked a cigarette. Seventeen years. That’s a long time. There are still times when I think about it; I would be lying if I told you that I never think about it. Then I have a flash of the following run through my head – why I quit:

  • my kids
  • my paternal grandmother (she died of lung cancer in 1999, shortly after I quit smoking)
  • how one puff will erase all of those years of my not smoking

I often referred to these facts to help get me through the tough spots:

  • 20 minutes after quitting: Your heart rate and blood pressure will drop.
  • 12 hours after quitting: The carbon monoxide level in your blood falls to normal.
  • 2 weeks to 3 months after quitting: Your circulation and lung function improve.
  • 9 months after quitting: Coughing and shortness of breath are reduced.
  • 1 year after quitting: Your risk of coronary heart disease is reduced to half of what it was when you smoked.
  • 5 years after quitting: Your risk of stroke is the same as if you had never smoked.
  • 10 years after quitting: Your chances of dying from lung cancer are now half of what it would have been had you continued to smoke. Your risk of getting cancer of the mouth, throat, esophagus, bladder, cervix, and pancreas has also decreased.
  • 15 years after quitting: Your risk of coronary heart disease is the same as if you’d never smoked. <—-THIS IS ME NOW!!!


I thank God for that day in spring of 1999 when I went to see my gynecologist and she recommended I try Zyban to quit smoking. I wasn’t sure I was really ready. I had been “ready” before, but I think that I really just wanted to satisfy those who wanted me to quit. Along with my doctor giving me some hard facts, my grandmother was dying of lung cancer and would pass away shortly after I quit. I took this as a huge sign that I needed to give quitting smoking everything that I had.

It wasn’t easy, but I did it. I remember smoking that last cigarette down as far as I could. I had started taking the Zyban a week or so before I quit, so that it would be in my system. It definitely helped with the cravings for nicotine, but I had to really work on changing my habits. I would drive a different route to work; follow a different routine for after meals, when I most wanted to smoke.

A lot has changed since that day in July 1999. I could write a book about all of the things that have happened, but I want to highlight those that have to do with my health and well being.

  • I got married to the man of my dreams. 
  • I gave birth to our daughter, Hannah.
  • I watched our son, Jon, graduate from high school and head off to college.
  • I went gluten-free and dairy-free.
  • I joined a gym and fell in love with strength training.
  • I discovered my love of running.
  • I have run 17+ half marathons, 2 full marathons, and numerous 5K and 10K races.
  • I became a personal trainer and strive to help other women realize their health and fitness goals.

Many of the above may not have been possible had I not quit smoking. 

IMG 0286

My friend, Laurie, and me after a July 4th 5K race. 

IMG 2102

Our family

Life is short. If you are a smoker, no one can make you quit, you have to want it. You have to want to be free from those chains and reach out for help. Help comes in many shapes and sizes and what works for one person may not work for another. Find what works for you. Have faith. Know that it won’t be easy, but I promise it will be worth it

– Kim

Review: Rudi’s Gluten-Free Bread

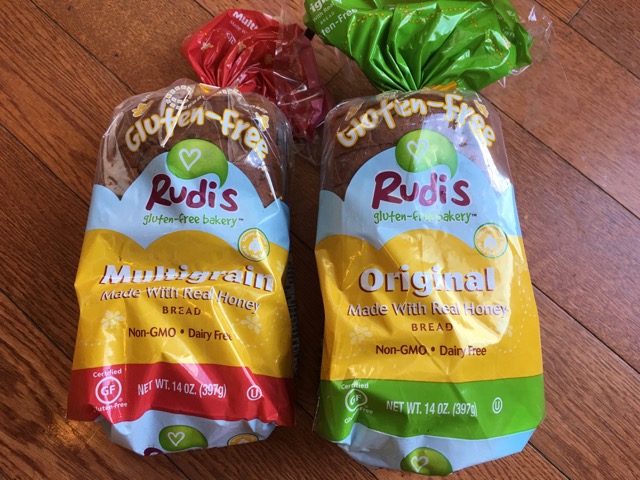
Rudi’s Gluten-Free Bakery introduced two new gluten-free breads in January. These breads can be found outside of the freezer section, in the baked goods or bread aisles in grocery stores across the US. More about the new breads:

  • Found in a store’s bread aisle or baked goods area, outside of the freezer section. No more defrosting!
  • Still has the incredible taste and fluffy texture gluten-free fans love from Rudi’s
  • Provides 5 grams of fiber per two slice serving
  • Made with non-GMO ingredients
  • Certified to 10ppm or less gluten per serving by the Gluten Free Certification Organization (GFCO)
  • Sweetened with a hint of golden honey, a fact made sweeter because Rudi’s Gluten-Free Bakery™  has donated to the Xerces Society to protect the bees that make it all possible

The new breads come in two different varieties:

Original – INGREDIENTS: Water, brown rice flour, rice starch, potato extract, bamboo fiber, sorghum flour, Non-GMO and expeller pressed canola oil, cane sugar, dried whole egg, honey, yeast, dried egg whites, chia protein, xanthan gum, sea salt, distilled vinegar.CONTAINS: Egg

Multi-Grain – INGREDIENTS: Water, brown rice flour, rice starch, potato extract, bamboo fiber, sorghum flour, Non-GMO and expeller pressed canola oil, cane sugar, dried whole egg, honey, yeast, millet, flaxseed, sunflower seeds, dried egg whites, chia protein, xanthan gum, sea salt, distilled vinegar.CONTAINS: Egg

BreadRudi

In addition to being free of gluten, these breads are also dairy-free and Non-GMO. The ingredients are easy to recognize and pronounce, which isn’t always the case with gluten-free breads. 

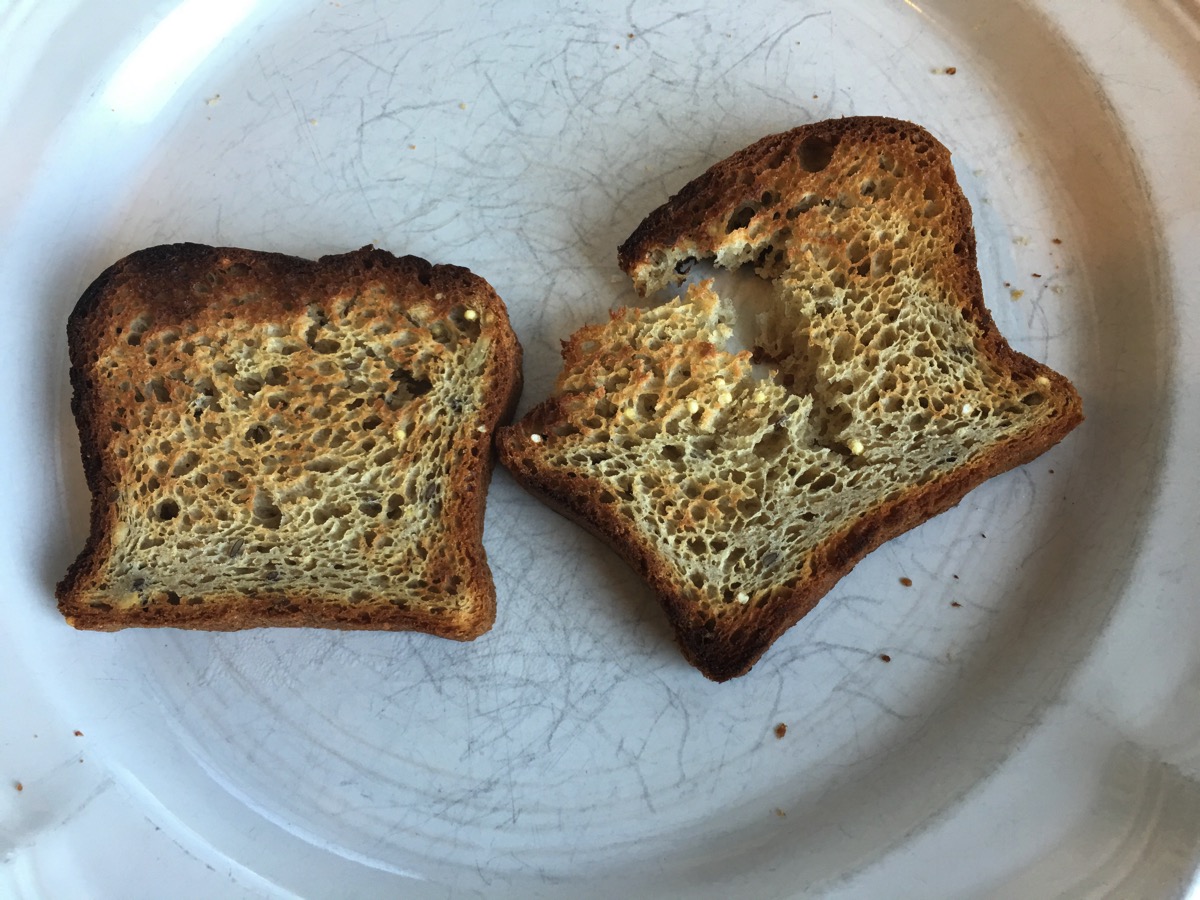
I decided to dig into Rudi’s Gluten-Free Multigrain Bread first. I needed something quick to eat after my Saturday long run before I took Hannah to ice skating. I decided that a PB & J would hit the spot and could be taken with me, if need be. I was disappointed that when I took two slices of bread out of the bag they didn’t seem to be sturdy enough to make any kind of a sandwich. I switched my thinking over to PB & J toast and tossed the bread into the toaster. I wanted to only lightly toast the bread, but it was almost falling apart, so I put it back into the toaster. This is what I ended up with…

IMG 1546

Too dark and still not sturdy, one piece falling apart. 

Today I tried a different approach using the Rudi’s Gluten-Free Original Bread. The bread seems a little sturdier and I lightly toasted it so that I could spread PB & J on it. Pre-toasting…

IMG 1555

Post-toasting with PB & J…

IMG 1557

This worked much better, though they bread still isn’t super-sturdy and I’m not sure it would stand up to anything but light sandwich fillings. The bread is also very small, so I probably could have eaten 4 slices of PB & J toast if I hadn’t had a large bowl of fruit along with this. I hate to be so negative about this bread because it really does have a great taste to it, but it doesn’t seem to be functional. I am going to see about using it to make French Toast. Eating the bread with a fork may be the best option. 

Have you tried the new Rudi’s Gluten-Free Breads? Did you have better luck with it? 

*The products mentioned in this post were sent to me free of charge for review purposes. The thoughts and opinions here are mine and have not been influenced by anyone or anything. 

Review: Daiya Cheezecake

I have tried quite a few new products lately, so I better get busy and blog about them! One of the foods I have missed tremendously since giving up dairy in addition to gluten is cheesecake. Cheesecake has always been one of my favorite desserts. I would choose cheesecake over pie or regular cake as a child. 

When I was at Portia’s Cafe in January and realized they had dairy-free, gluten-free cheezecake I began to realized that maybe I didn’t have to go without. Then I found Daiya Cheesecake at Raisin Rack, our local health food store, a day or two later. 

https://farm2.staticflickr.com/1456/23896026823_dac65abb32_z.jpg

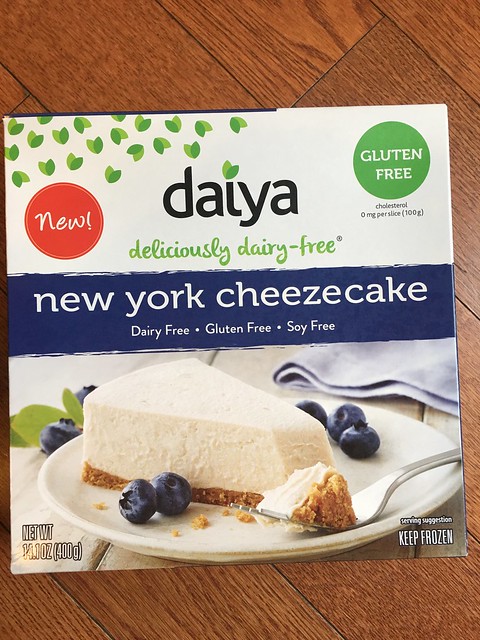
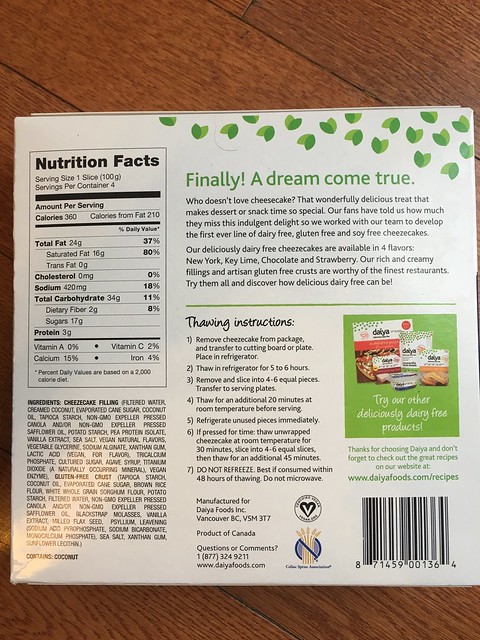
In addition to being free of gluten and dairy, the Daiya Cheezecake is also free of soy. 

https://farm2.staticflickr.com/1595/24440485951_6737013561_z.jpg

I followed the instructions on the box, thawing the cheezecake in the refrigerator for 5 to 6 hours, but still needed to let it sit out on the counter for a short amount of time. If there is one thing I have learned over the past 10 years of being gluten-free, and now dairy-free for the last 8 months, it is to not go into tasting something “new” with any preconceived notions. I didn’t want to imagine this cheezecake was going to taste identical to the cheesecake I was used to eating before. I cleared my palate and my head and dug in. Wow! I am impressed with both the flavor and texture of this cheesecake. The texture is dense and creamy, just like that of a regular cheesecake. Definitely something I will be purchasing again!

In addition to the New York Cheezecake variety, Daiya also offers a Key Lime, Strawberry, and Chocolate variety. Check the store locator to see where to find Daiya products close to you. 

Have you tried the Daiya Cheezecake? If so, what did you think?

Related Posts with Thumbnails